English

日本語

PSYCHEXP
TUTORIAL

Build a Levels of Processing Task in 30 seconds Fully Customizable
Build a Levels of Processing Task in 30 seconds step 1

STEP 1

In this tutorial we will be adding a Levels of Processing Task to a Psychexp project.

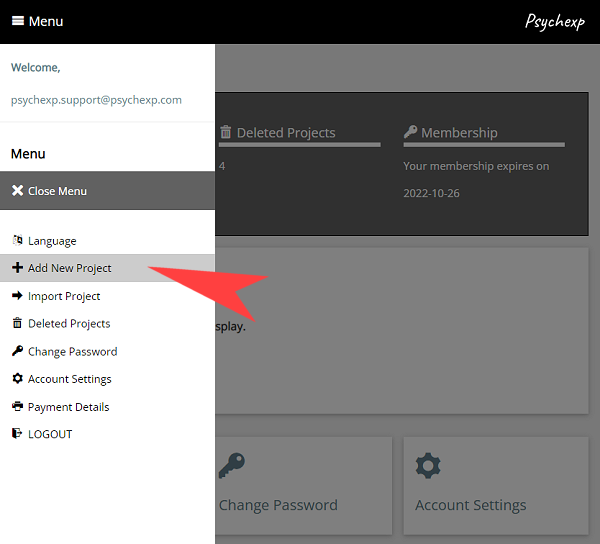
Let us begin by firstly logging in to psychexp and then select "Add New Project" from the menu.

Enter a project name and click submit. (We will call our project "PROJECT 1")

STEP 2

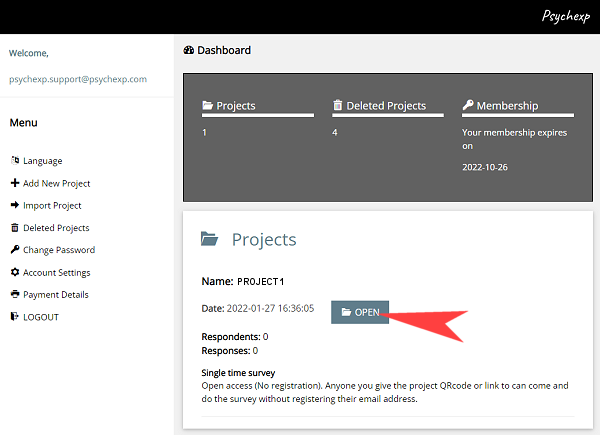
You will be returned to the dashboard, so then find the project you just created in the project list and click "Open".

Build a Stop Signal Task in 30 seconds step 2
Build a Stop Signal Task in 30 seconds step 3

STEP 3

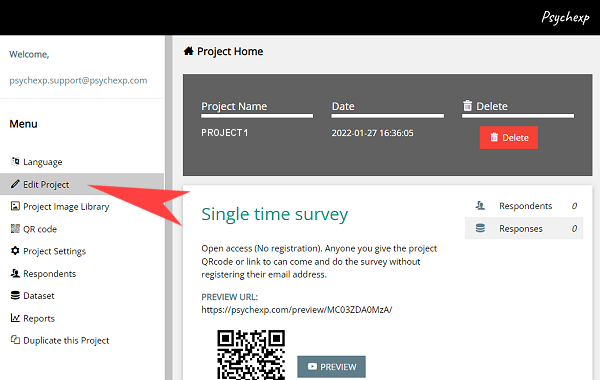
You are now on the project home page, so click on the "Edit Project" button from the side menu.

STEP 4

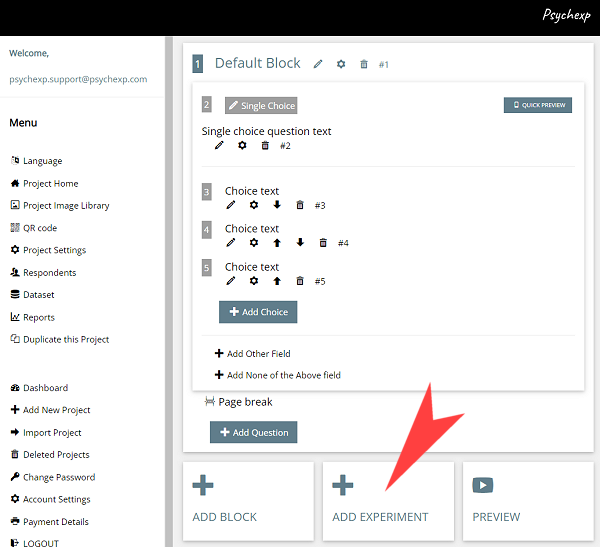
When you first create a project in Psychexp a block with one single choice question is inserted by default.

We are going to add the Levels of Processing Task below this default block by simply clicking the "ADD EXPERIMENT" button and selecting "LEVELS OF PROCESSING TASK" from the list that is displayed.

Build a Stop Signal Task in 30 seconds step 4
Build a Stop Signal Task in 30 seconds step 5

STEP 5

A fully functional Levels of Processing Task has now been inserted.

Let's take a look at the structure of the default experiment, and then see how you can customize it to make it your own.

The entire experiment is housed inside of a single block named "Default Block". You can change the name of the block by clicking on the edit (pencil) icon next to the block name.

By clicking on the experiment block settings (cog) icon, you can make changes to the following settings of the experiment;

  • Left Key
  • Right Key
  • Left Button
  • Right Button
  • Background Color [Hexadecimal]
  • Font Color [Hexadecimal]
  • Interstimulus interval (ms)
  • Display Result Page

Next you will see a text only information page that is shown to the participant before the experiment begins. This page is fully customizable by clicking the edit (pencil) icon. You can also add extra pages by clicking the "Add Text Only Page" Button.

Following the information page there are four sections. These four sections include all the components that will be used to build the flow of the experiment.

  • QUESTIONS: You can add as many questions as you require. You can also add as many YES or NO answer stimulus as you require. Please note: If you use the question in the LEVELS OF PROCESSING TASK FLOW section, all of the YES and NO stimulus you have added to this question will be used in all sections of the experiment.
  • DISTRACTOR STIMULUS: You can add as many distractor stimulus as you require. Please note: All of the stimulus you add to this section will be used in the experiment.
  • MESSAGES: You can create as many messages as is required. These messages will be displayed to the participant during the experiment. At what point they will be displayed during the expeirment is set in the FLOW SECTION explained below.
  • FIXATION POINT: The fixation point is displayed prior to the stimulus being shown (optional). You can add as many text or image fixation points as you wish here and then allocate them in the FLOW SECTION explained below.
STEP 6

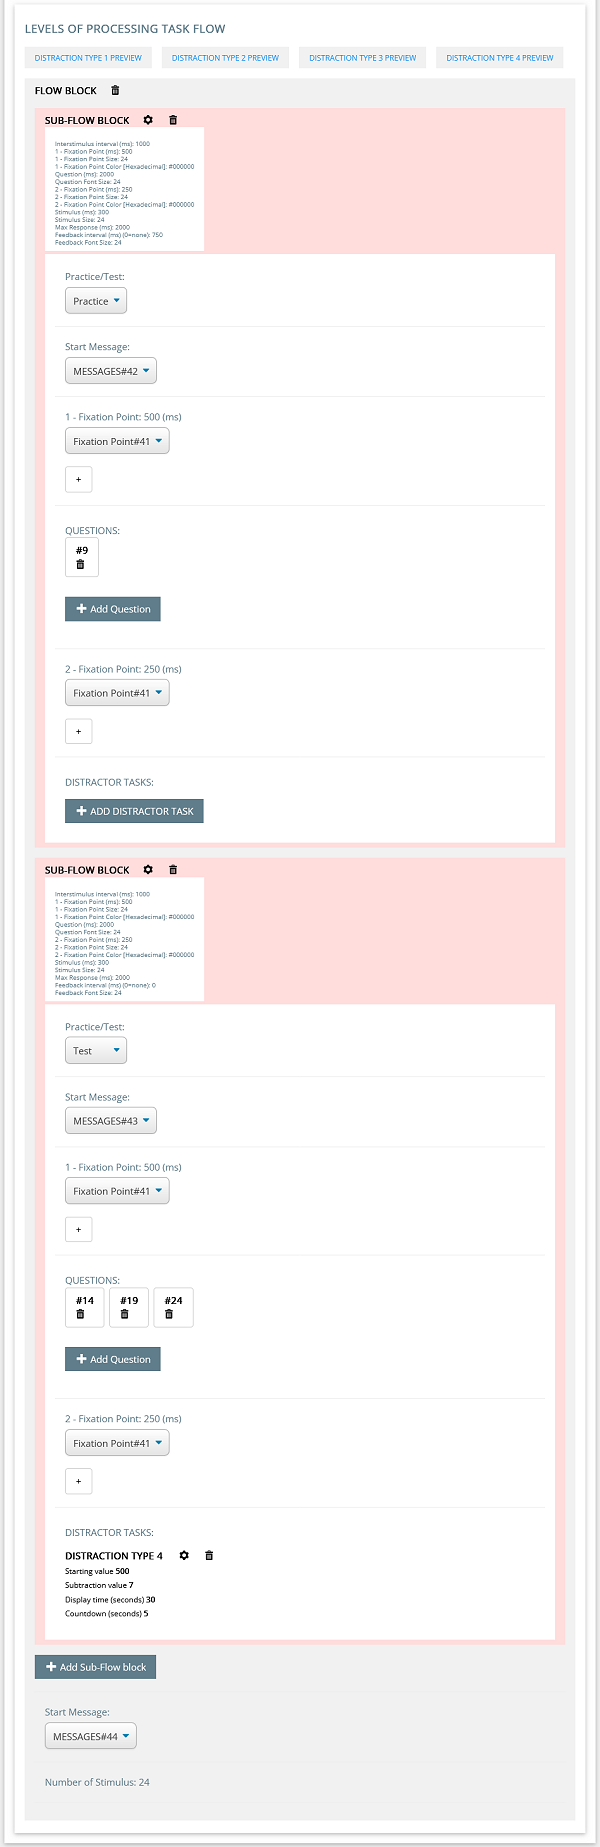
Now we will look at the flow of the Levels of Processing Task. The flow comprises of one Flow block which contains multiple sub-flow blocks.

You can add as many sub-flow blocks as you wish to create your desired experiment.

The sub-flow block contains the following components.

  • Practice/Test: Data from sub-flow blocks set to PRACTICE will not be used in any dataset calculations.
  • Start Message: The start message is shown prior to the group of trials set in this sub-flow block. (optional)
  • 1 - Fixation Point: This fixation point is shown before the question is displayed. Set the number of milliseconds to display by clicking the settings (cog) icon.
  • Questions: If you add a question to a sub-flow block it will result in the question being asked once for each YES and NO answer you have assigned to the question. All the answers associated with the questions used in a sub-flow block will be shuffled, which results in the randomization of the order of the questions displayed. You can use the same question in multiple sub-flow blocks. The answers associated with a question used in multiple sub-flow blocks will only be used once in the final section of the experiment. (The final section of the experiment takes all the answers from questions that were used in all sub-flow blocks and shuffles these answers together with the stimulus in the DISTRACTOR STIMULUS section, then presents them one by one to the respondent for evaluation.)
  • 2 - Fixation Point: This fixation point is shown before the answer is displayed. Set the number of milliseconds to display by clicking the settings (cog) icon.
  • DISTRACTOR TASKS: One of four distractor tasks can be selected. The distractor task will run after all the question and answer stimulus stipulated in the QUESTIONS section of the sub-flow block have been shown.

By clicking the sub-flow block settings (cog) icon, you can change the following settings.

  • Interstimulus interval (ms): This is the number of millseconds a blank interval is displayed prior to each question being displayed. If 1-Fixation Point is set the Interstimulus interval runs prior to the fixation point being displayed.
  • 1 - Fixation Point (ms): This is the number of millseconds the fixation point will be displayed prior to the question.
  • 1 - Fixation Point Size: Point size for text, or height in pixels for image.
  • 1 - Fixation Point Color [Hexadecimal]: Only used if the fixation point used is text.
  • Question (ms): This is the number of millseconds the question will be displayed.
  • Question Font Size: The size of the question text.
  • 2 - Fixation Point (ms): This is the number of millseconds the fixation point will be displayed prior to the answer.
  • 2 - Fixation Point Size: Point size for text, or height in pixels for image.
  • 2 - Fixation Point Color [Hexadecimal]: Only used if the fixation point used is text.
  • Stimulus (ms): This is the number of millseconds the answer (stimulus) will be displayed.
  • Stimulus Size: Point size for text, or height in pixels for image.
  • Max Response (ms): This is the number of millseconds before the next question will be shown when no response is given. Set this to zero if no maximum response time is required.
  • Feedback interval (ms): The length of time feedback is displayed. Feedback can be displayed on both practice or test trials by setting this field to a value other than zero.
  • Feedback Font Size: The point size of the feedback circle or cross.

After you have made changes to the default experiment, you can see a live preview of the experiment by clicking the "Preview" button at the bottom of the page. You can preview the project as many times as you want. The preview screens are identical to the screens your participants will see when you distribute your project, however the data from a preview is not saved in the dataset.

Build a Stop Signal Task in 30 seconds step 6

STEP 7

Once you are happy with the design of your experiment you can then adjust the flow of your entire project by editing or deleting the default survey question block that was inserted when you initially made the project. You can also add more survey question blocks or even other experiment blocks under your current experiment by simply clicking on the "ADD BLOCK" or "ADD EXPERIMENT" buttons at the bottom of the page. The combination of experiments and survey questions that you can achieve is only limited by your own imagination!

PRO TIP Changing the order of the flow of survey question blocks and experiment blocks in your project is as easy as using the up and down arrow buttons that can be found at the top of each survey question or experiment block.

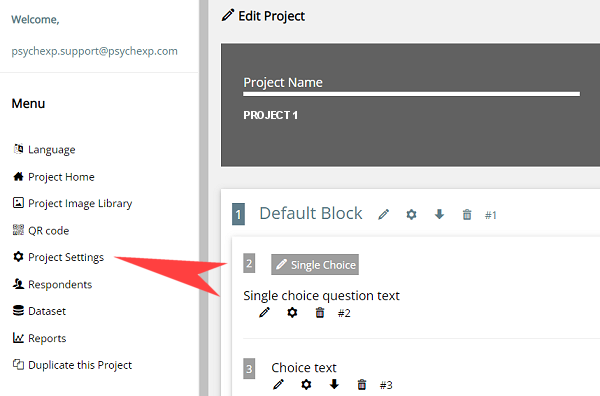
Before distributing your project to your participants be sure to adjust the project settings by clicking on "Project Settings" in the menu.

These are just a few of the many settings you can adjust:

  • Single or multiple time project participation
  • Require email registration
  • Set start and finish dates for participation
  • Record geolocation
  • Registration Page Logo
Build a Stop Signal Task in 30 seconds step 8
Build a Stop Signal Task in 30 seconds step 9

STEP 8

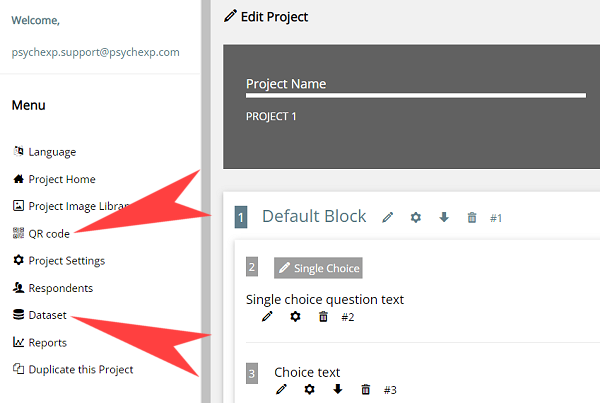
When you are ready to distribute your project to your participants, click on "QR code" in the menu to get the URL link or QR code for this project

PRO TIP Once a participant has responded to your survey or experiment, you are no longer able to make changes to the project in the "Edit Project" screen. Use the project "PREVIEW" button extensively to check your project prior to distributing it to any participants.

To view the data collected from your participants, click on "Dataset" in the menu.

The dataset will be downloaded in excel format

CORRECT: 0=incorrect key 1=correct key

The default procedure for the stop signal task refers to the following paper. However, partial changes have been made to the experimental procedures and stimulus:
Craik, F. I. M., & Tulving, E. (1975). Depth of processing and the retention of words in episodic memory. Journal of Experimental Psychology: General, 104(3), 268–294.