English

日本語

PSYCHEXP
TUTORIAL

Build a STROOP Test in 30 seconds Fully Customizable
Build a STROOP Test in 30 seconds step 1

STEP 1

In this tutorial we will be adding a Stroop Test to a Psychexp project.

Let us begin by firstly logging in to psychexp and then select "Add New Project" from the menu.

Enter a project name and click submit. (We will call our project "PROJECT 1")

STEP 2

You will be returned to the dashboard, so then find the project you just created in the project list and click "Open".

Build a STROOP Test in 30 seconds step 2
Build a STROOP Test in 30 seconds step 3

STEP 3

You are now on the project home page, so click on the "Edit Project" button from the side menu.

STEP 4

When you first create a project in Psychexp a block with one single choice question is inserted by default.

We are going to add the Stroop Test below this default block by simply clicking the "ADD EXPERIMENT" button and selecting "STROOP TEST" from the list that is displayed.

Build a STROOP Test in 30 seconds step 4
Build a STROOP Test in 30 seconds step 5

STEP 5

A fully functional Stroop Test has now been inserted.

Let's take a look at the structure of the default experiment, and then see how you can customize it to make it your own.

The entire experiment is housed inside of a single block named "Default Block". You can change the name of the block by clicking on the edit (pencil) icon next to the block name.

Next you will see a text only information page that is shown to the participant before the experiment begins. This page is fully customizable by clicking the edit (pencil) icon. You can also add extra pages by clicking the "Add Text Only Page" Button.

Following the information page there are two sections, the first called colors, and the second called stimulus.

The colors in the colors section represent the buttons that will be shown to the respondent and you can have a maximum of six buttons.

In the Stimulus section you can edit or delete the default stimulus. And you can add more stimulus by clicking the “Add Stimulus” button.

STEP 6

Now we will look at the flow of the Stroop Test. The flow comprises of Flow blocks, sub-flow blocks and trial groups. The block and sub-flow blocks are used to categorize the randomization of the trial groups. By clicking on the flow block or sub flow block settings (cog) icon you can turn on or turn of the randomization for that item.

You can add as many blocks or sub-flow blocks as you wish to create your desired experiment.

You can also add as many trial groups as you would like to each sub-flow block.

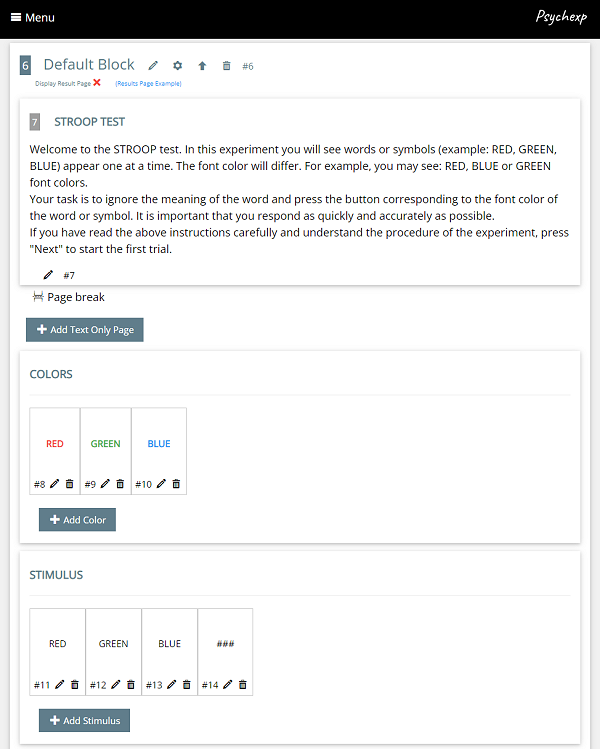
Each trial group determines the combination of stimulus to be shown.

Trial group 1 currently has 3 stimulus and they are all classed as compatible because the stimulus text and the color are the same. As this trial is set as a "practice", it will not be included in the average reaction time calculation.

In Trial Group 2 there are 4 stimulus and the first 3 are set to incompatible because the meaning of the text is not the same as the color that has been set. The fourth stimulus is not a word so it has been classed as a non-word. This trial is also set as a "practice".

In trial group 3 there is a total of 12 stimulus that consists of a combination of compatible, incompatible and non-word stimulus. As this trial is set as "Test", the average reaction time is calculated for each type of stimulus.

Setting the stimulus to compatible, incompatible and non-word is done manually for each stimulus by clicking on the settings icon. It is important to set each stimulus correctly to ensure that the results of the experiment are calculated correctly.

Clicking on the settings (cog) icon under the trial group name allows you to change the settings for each individual trial group.

The number of loops represents how many times each stimulus will be shown. Setting this to 2 in Trial group 3 would mean that each of the 12 stimulus would be shown twice, resulting in 24 stimulus being shown in the trial group.

The interstimulus interval is the length of blank screen prior to a stimulus being displayed, and the feedback interval sets the length of time a red cross or green circle is displayed to let the respondent know if they got the answer correct or not. Setting this to zero will stop any feedback from being displayed.

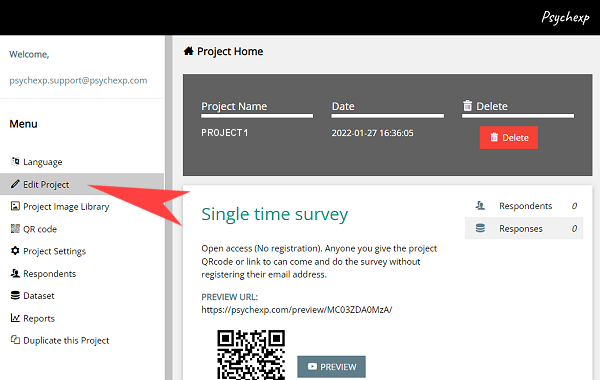
After you have made changes to the default experiment, you can see a live preview of the experiment by clicking the "Preview" button at the bottom of the page. You can preview the project as many times as you want. The preview screens are identical to the screens your participants will see when you distribute your project, however the data from a preview is not saved in the dataset.

Build a STROOP Test in 30 seconds step 6
Build a STROOP Test in 30 seconds step 7

STEP 7

By clicking on the experiment block settings (cog) icon, you can make changes to the following settings of the experiment;

  • Text stimulus font size
  • Text stimulus font color
  • Experiment background color
  • Display result page to participant

STEP 8

Once you are happy with the design of your experiment you can then adjust the flow of your entire project by editing or deleting the default survey question block that was inserted when you initially made the project. You can also add more survey question blocks or even other experiment blocks under your current experiment by simply clicking on the "ADD BLOCK" or "ADD EXPERIMENT" buttons at the bottom of the page. The combination of experiments and survey questions that you can achieve is only limited by your own imagination!

PRO TIP: Changing the order of the flow of survey question blocks and experiment blocks in your project is as easy as using the up and down arrow buttons that can be found at the top of each survey question or experiment block.

Before distributing your project to your participants be sure to adjust the project settings by clicking on "Project Settings" in the menu.

These are just a few of the many settings you can adjust:

  • Single or multiple time project participation
  • Require email registration
  • Set start and finish dates for participation
  • Record geolocation
  • Registration page logo
Build a STROOP Test in 30 seconds step 8
Build a STROOP Test in 30 seconds step 9

STEP 9

When you are ready to distribute your project to your participants, click on "QR code" in the menu to get the URL link or QR code for this project.

PRO TIP: Once a participant has responded to your survey or experiment, you are no longer able to make changes to the project in the "Edit Project" screen. Use the project "PREVIEW" button extensively to check your project prior to distributing it to any participants.

To view the data collected from your participants, click on "Dataset" in the menu.

The dataset will be downloaded in excel format.

For a more detailed explanation and a preview of the default experiment, check out the video tutorial.

Psychexp Video Tutorial: Build a STROOP Test in 30 seconds
The default procedure for the Stroop task refers to the following paper. However, partial changes have been made to the experimental procedures and stimulus words: Stroop, J. R. (1935). Studies of interference in serial verbal reactions. Journal of Experimental Psychology, 18(6), 643–662.