In this tutorial we will be taking a look at the basics of creating a survey or experiment in psychexp.
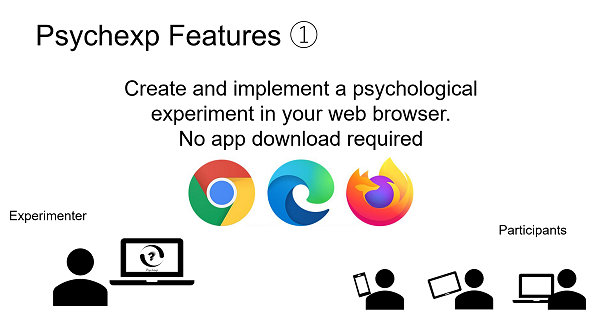
Projects that you make in psychexp can be run on the browser of any device without the need to download any type of app.
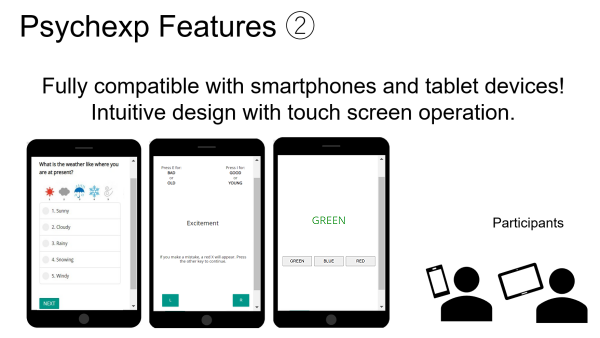
You can seamlessly combine an unlimited number of surveys and experiments into one project, and all survey and experiment components have been designed to look great on any smartphone or tablet.
Let us begin by firstly logging in to psychexp and then select "Add New Project" from the menu.
Enter a project name and click submit. (We will call our project "PROJECT 1")
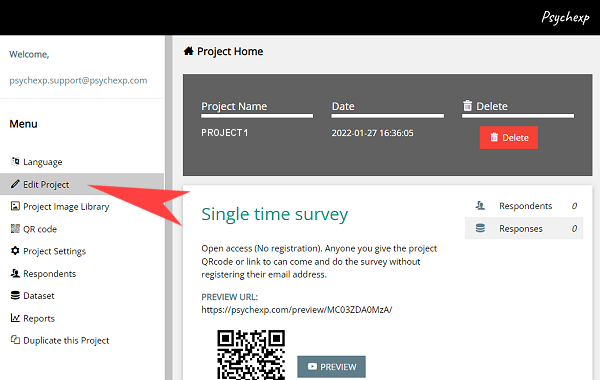
You will be returned to the dashboard, so then find the project you just created in the project list and click "Open".
2 - Edit Project
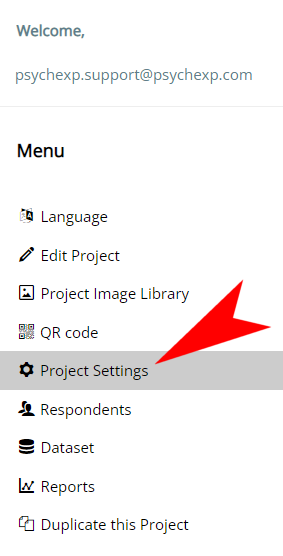
You are now on the project home page, so click on the "Edit Project" button from the side menu.
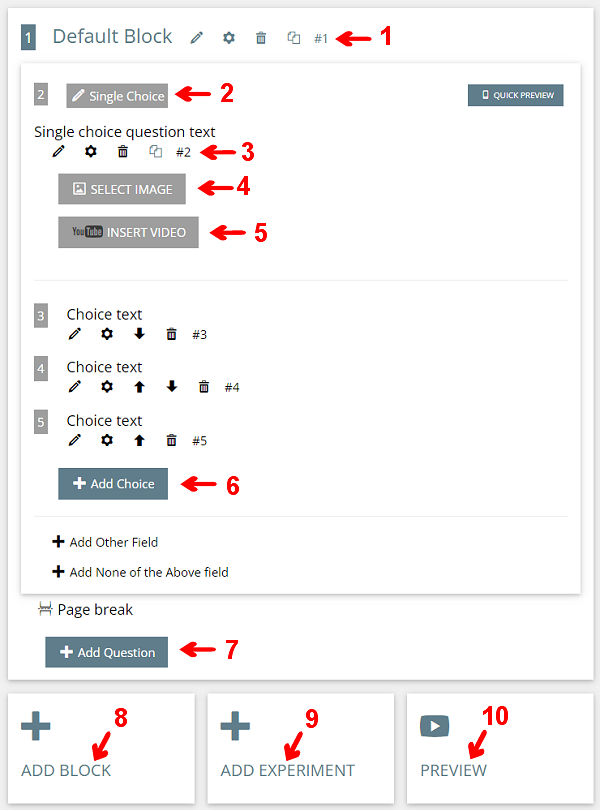
When you first create a project in Psychexp a block with one single choice question is inserted by default.
1 Click on the various icons to make changes to the block.
Modify the block heading
Change the block settings
Delete the block and all items in it
Duplicate the block and all items in it
2 To change the question type simply click on the grey button and select the question type from the list.
3 Click on the various icons to make changes to the question or choices.
Modify the text
Change the question or choice settings
Move the item up in the flow
Move the item down in the flow
Delete the item
Duplicate the question
4 Click on the button to insert an image.
5 Click on the button to insert a YouTube video.
6 Click on the button to add more choices.
7 Click on the button to add more questions inside this block.
8 Click on the button to add another block.
PRO TIP Click the block settings icon to randomize the flow of questions within a block. Using multiple blocks allows you to randomize just certain sets of questions.
9 Click on the button to select an experiment to insert in the flow.
10 Click on the button to view a preview of the whole project. No data is saved to the database when viewing the preview.
PRO TIP Clicking the quick preview button displays a preview of just the single question in a smartphone or tablet layout.
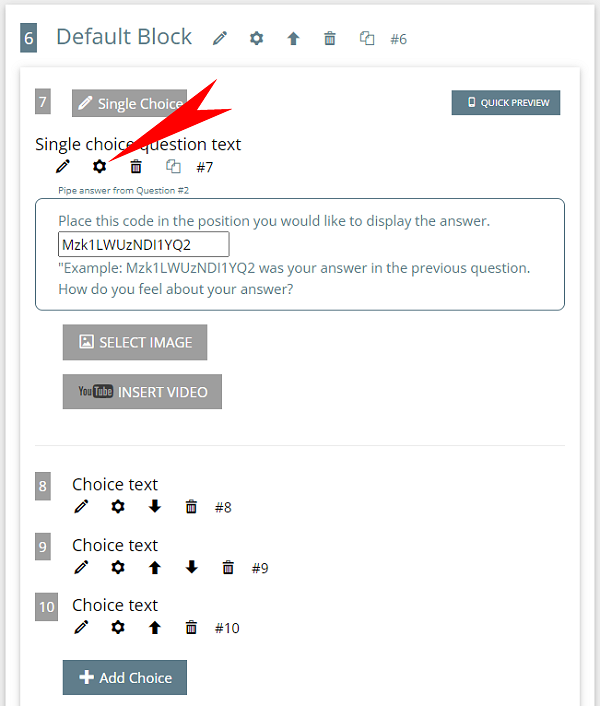
3 - Piping
The piping function allows you to display within your question text the answer selected by your respondent in a previous question.
Click the settings icon of the question that you would like to display a piped answer in.
From the piping dropdown list select the question you would like to pipe from. A piping code will then be displayed.
Click the edit icon and then place the code in the position you would like the piped answer to be displayed.
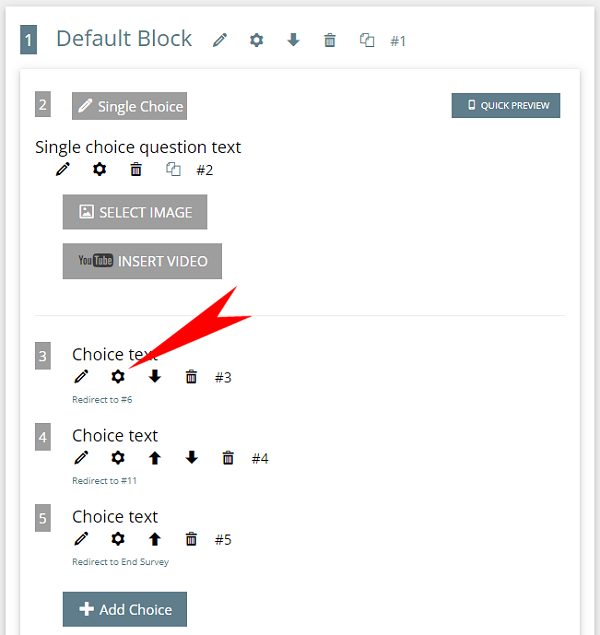
4 - Redirect to
The redirect function allows you to jump to another block based on your respondent's response. Redirecting based on the respondent's response is only available on the single choice question type.
Click the settings icon of the choice that you would like to set the redirect on.
From the redirect dropdown list select the block you would like to redirect to.
For all other question types, you can set a redirect on the entire question, regardless of the answer selected, by clicking on the settings icon directly under the question.
If you have more than one question in a block the redirect will occur after all questions in the block have been answered.
PRO TIP You can force the redirect to occur immediately after the question is answered, even if there are other questions still remaining in the block, by turning on "Redirect Immediately" in the block settings. Note: This same functionality can be achieved by inserting a "Scenario Experiment" into your project. Using the "Scenario Experiment" has the benefit of supplying more detail in your dataset.
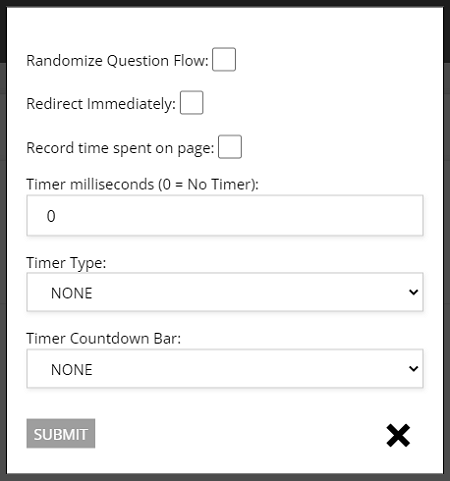
5 - Timer Settings
All survey question types can be made to automatically perform certain actions after a stipulated number of milliseconds. The settings are set per block and as such all questions contained within the block will perform the same action.
Click the settings icon of the block that you would like to set the automatic action on.
Set the number of milliseconds you would like to pass prior to the action occuring in the "Timer milliseconds" field.
Select the type of action you would like to occur from the "Timer Type" dropdown list.
Hide NEXT button until time expires
Next page when time expires (hide next button)
Next page when time expires (show next button)
Disable responses when time expires
If you want to display a countdown bar that shows how much time is left until the action will occur, select the countdown timer type from the "Timer Countdown Bar" dropdown list
Countdown bar
Countdown bar with numbers
You can record how much time the respondent spends on the page by placing a check in the "Record time spent on page" checkbox. The logged time will be shown in the project dataset.
PRO TIP If you display multiple questions on a single page, the "Record time spent on page" value shown in the dataset will be the same for all of the questions displayed on the same page.
You can experience all of the timer functions in a demo project by clicking on the preview URL below. Alternatively, you can scan the QRcode to try it on a smartphone. No data from this demo preview is collected or stored. You can view the preview as many times as you like.
On the project settings page you can change the project type and also adjust the basic settings that determine how the project will run.
The settings are divided into two sections, basic and advanced. Note: Once a respondent has participated in the survey or experiment, no changes can be made to the project on the edit project page, or in the advanced settings on the project settings page.
PRO TIP Use the preview function extensively to ensure your project is exactly the way you want it prior to distributing the survey or experiment to your respondents.
Basic Settings
Registration Page Logo
Survey Title (Title shown in browser tab or window) (maximum 50 characters)
Message at end of survey
Expired survey (Message shown if the survey link has expired)
Registration open date
Registration close date
Display ID at end of survey (
A unique number assigned to each email address. All surveys completed using the same email address to register will show the same roaming ID. )
Limit number of responses (0=unlimited) (
Survey registration will be blocked once the stipulated number of responses is reached. Calculated by number of surveys started, not surveys completed. )
Limit number of respondents (0=unlimited) (
Survey registration will be blocked once the stipulated number of respondent registrations is reached. )
Record geolocation (User must give their approval when prompted by the browser, or no location will be recorded)
Make Project Exportable
Anyone you give the import code to will be able to import the project into their own psychexp account. (Only imports components. No respondents or data are imported)
Advanced Settings
Single time survey
Open access (No registration). Anyone you give the project QRcode or link to can come and do the survey without registering their email address.
Open access (Email registration). Anyone you give the project QRcode or link to can come and register for the project and do the survey.
Closed access (Upload email address list, or transfer email address list from another project). Only those you give the project QRcode or link to that are on the email list can come and register for the project and do the survey.
Multiple times survey
Open access (Email registration). Anyone you give the project QRcode or link to can come and register for the project and do the survey.
Closed access (Upload email address list, or transfer email address list from another project). Only those you give the project QRcode or link to that are on the email list can come and register for the project and do the survey.
Team Settings
You can have another Psychexp member collaborate on your project by registering their Psychexp login email address (includes FREE accounts).
Team members can access and edit all aspects of this project in the same way as you can, however they do not have access to the duplicate project function page.
To add a team member to the project, simply register the Psychexp account login email address of the member you want to invite. The project will immediately be displayed at the top of the list of projects on their dashboard page.
You can revoke their access to the project at any time simply by deleting their email address from the team members list on the settings page of the project.
7 - Registration link
Once you have completed all changes and you are ready to distribute your project, click on QR code in the menu to obtain the individual project URL or qr code to distribute to your respondents.
PRO TIP Use the preview function extensively to ensure your project is exactly the way you want it prior to distributing the survey or experiment to your respondents. Note: Once a respondent has participated in the survey or experiment, no changes can be made to the project on the edit project page, or in the advanced settings on the project settings page.
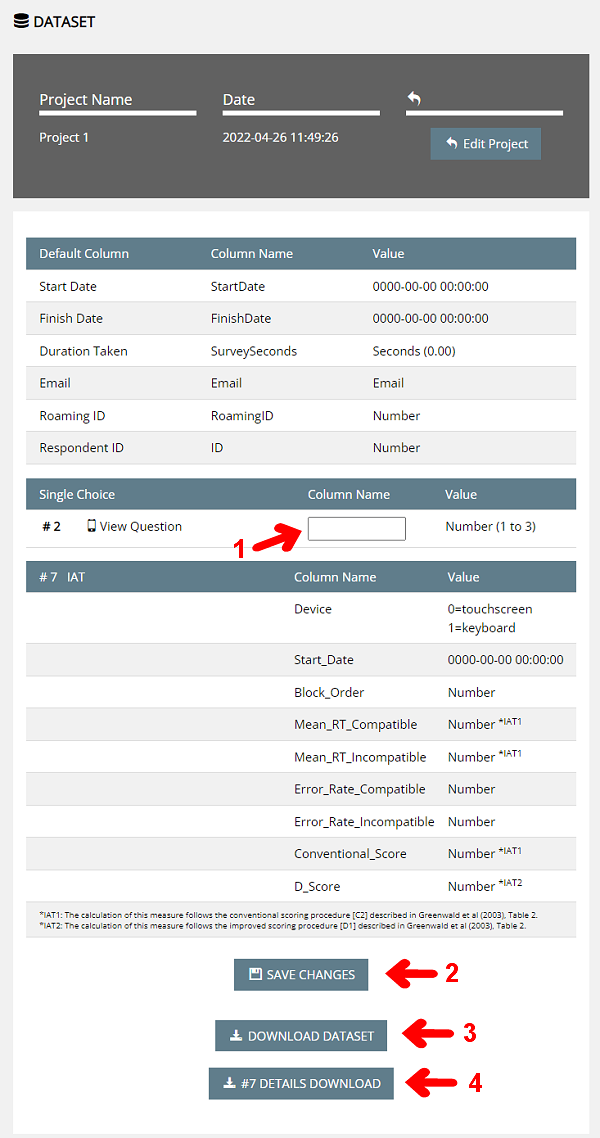
8 - Dataset
Once your project has been distributed and respondents have completed your survey or experiment, you can download the data at any time by clicking the dataset tab in the menu.
1 Prior to downloading the data you will need to set the dataset column headings.
Each column heading must be unique and only alphanumeric characters can be used.
2 Once you have changed the headings click the "Save Changes" button.
3 Clicking on the "Download Dataset" button will download a summary of all survey and experiment answers from the project in excel format.
4 If you have one or more experiments in your project you will also see a "Details Download" button for each experiment in your project.
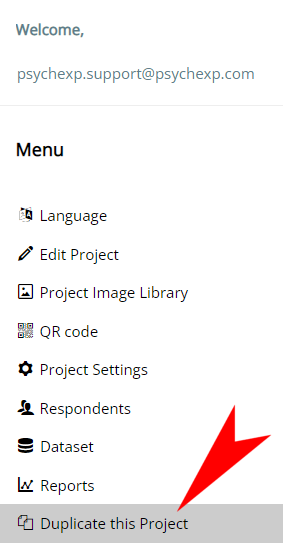
9 - Duplicate this Project
Click on "Duplicate Project" in the menu and then enter a name for the new project that will be created.
Only the project components will be duplicated in the new project. No respondents or respondent data is transferred to the new project.
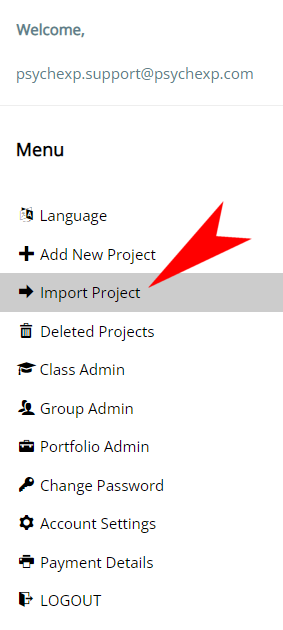
10 - Import Project
Click on "Import Project" in the menu and then enter a name for the new project and the import code that the person exporting the project has supplied.
Only the project components will be imported. No respondents or respondent data is imported to the new project.
Note: You cannot import one of your own projects. Use the "Duplicate Project" function to copy a project in your own account.
Survey Question Types
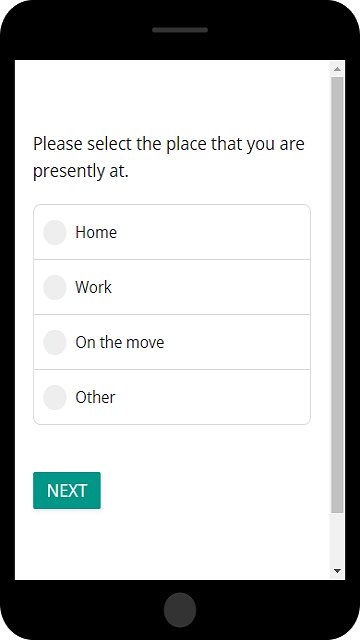
- Single Choice -
A "single choice" question is a type of question where one of several options is selected. The options are indicated by radio buttons.
QUESTION OPTION SETTINGS
Add Page Break
Randomize Choices
Force Responses
Redirect to
Piping
BLOCK OPTION SETTINGS
Record time spent on page
Hide NEXT button until time expires
Next page when time expires (hide next button)
Next page when time expires (show next button)
Disable responses when time expires
If the option checkbox has a blue tick, it is selected. Click again to return to blank (no selection). Once you have changed your selection, be sure to press "Submit".
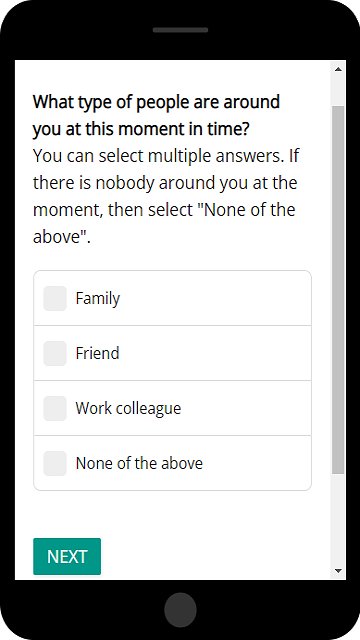
- Multiple Choice -
A "multiple choice" question is a type of question that allows you to select one or more of several options. The options are indicated by tick boxes.
QUESTION OPTION SETTINGS
Add Page Break
Randomize Choices
Force Responses
Redirect to
Piping
BLOCK OPTION SETTINGS
Record time spent on page
Hide NEXT button until time expires
Next page when time expires (hide next button)
Next page when time expires (show next button)
Disable responses when time expires
If the option checkbox has a blue tick, it is selected. Click again to return to blank (no selection). Once you have changed your selection, be sure to press "Submit".
- Text only -
The "Text only" type displays only text, not in the form of a question. It can be used in various ways, such as displaying an explanation of how to answer the questions in the survey.
QUESTION OPTION SETTINGS
Add Page Break
Redirect to
Piping
BLOCK OPTION SETTINGS
Record time spent on page
Hide NEXT button until time expires
Next page when time expires (hide next button)
Next page when time expires (show next button)
If the option checkbox has a blue tick, it is selected. Click again to return to blank (no selection). Once you have changed your selection, be sure to press "Submit".
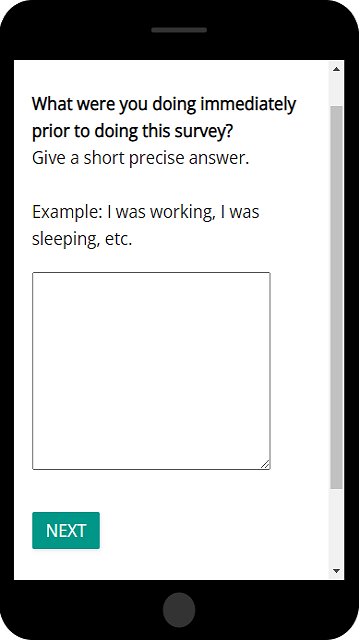
- Text answer field -
"Text Answer Field" questions are those in which the respondent can enter words or sentences into a textarea.
QUESTION OPTION SETTINGS
Add Page Break
Force Responses
Minimum Characters
Maximum Characters
Textarea height (lines)
Redirect to
Piping
BLOCK OPTION SETTINGS
Record time spent on page
Hide NEXT button until time expires
Next page when time expires (hide next button)
Next page when time expires (show next button)
Disable responses when time expires
If the option checkbox has a blue tick, it is selected. Click again to return to blank (no selection). Once you have changed your selection, be sure to press "Submit".
- Matrix table -
Matrix (grouped) questions are those where several items are grouped using a common grouping scheme. The options are indicated by radio buttons.
QUESTION OPTION SETTINGS
Add Page Break
Randomize Choices
Force Responses
Question always visible
Redirect to
Piping
BLOCK OPTION SETTINGS
Record time spent on page
Hide NEXT button until time expires
Next page when time expires (hide next button)
Next page when time expires (show next button)
Disable responses when time expires
If the option checkbox has a blue tick, it is selected. Click again to return to blank (no selection). Once you have changed your selection, be sure to press "Submit".
PRO TIP If the "Question always visible" option is checked the question box will always remain visible at the top of the screen when the page is scrolled. Note: If your question is too long it may take up too much space on a mobile phone screen causing the choices to be hidden behind it. Check the preview on a mobile phone and if required turn this option off so that the question scrolls and does not remain visible at the top of the screen.
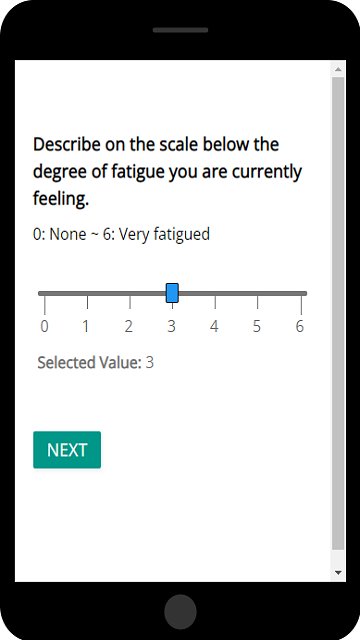
- Slider -
A "Slider" is a type of question that is answered by altering the position to the left or right on a scale represented by line segments.
QUESTION OPTION SETTINGS
Add Page Break
Steps
First Number
Last Number
Default Value
Redirect to
Piping
BLOCK OPTION SETTINGS
Record time spent on page
Hide NEXT button until time expires
Next page when time expires (hide next button)
Next page when time expires (show next button)
Disable responses when time expires
If the option checkbox has a blue tick, it is selected. Click again to return to blank (no selection). Once you have changed your selection, be sure to press "Submit".
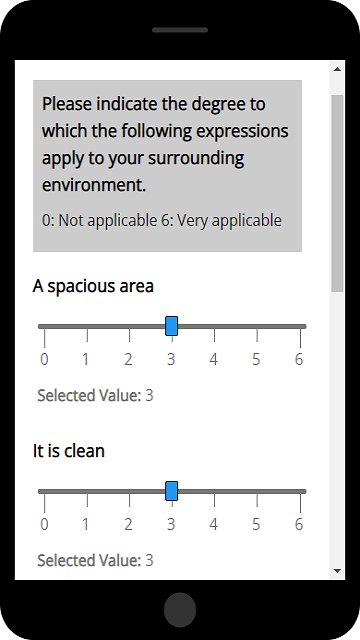
- Matrix Slider -
A "matrix slider" is a type of question in which the respondent is asked to grade multiple items by altering the position to the left or right on each scale represented by line segments.
QUESTION OPTION SETTINGS
Add Page Break
Randomize Choices
Steps
First Number
Last Number
Default Value
Question always visible
Redirect to
Piping
BLOCK OPTION SETTINGS
Record time spent on page
Hide NEXT button until time expires
Next page when time expires (hide next button)
Next page when time expires (show next button)
Disable responses when time expires
If the option checkbox has a blue tick, it is selected. Click again to return to blank (no selection). Once you have changed your selection, be sure to press "Submit".
PRO TIP If the "Question always visible" option is checked the question box will always remain visible at the top of the screen when the page is scrolled. Note: If your question is too long it may take up too much space on a mobile phone screen causing the choices to be hidden behind it. Check the preview on a mobile phone and if required turn this option off so that the question scrolls and does not remain visible at the top of the screen.
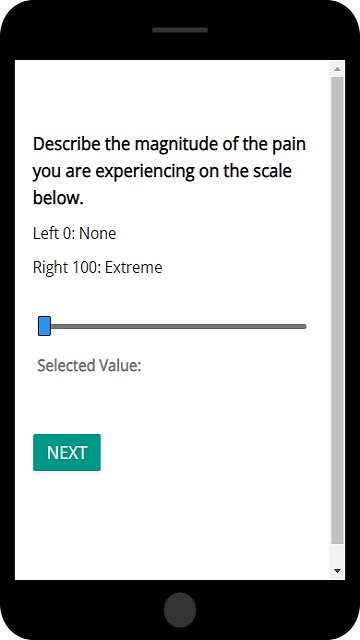
- VAS (Visual Analog Scale) -
"VAS (visual analog scale)" questions are continuous rating indicators represented on a line segment. Any integer value between the starting point (minimum value) and the end point (maximum value) can be selected by moving the selector left or right.
QUESTION OPTION SETTINGS
Add Page Break
Randomize Choices
First Number
Last Number
Default Value
Redirect to
Piping
BLOCK OPTION SETTINGS
Record time spent on page
Hide NEXT button until time expires
Next page when time expires (hide next button)
Next page when time expires (show next button)
Disable responses when time expires
If the option checkbox has a blue tick, it is selected. Click again to return to blank (no selection). Once you have changed your selection, be sure to press "Submit".
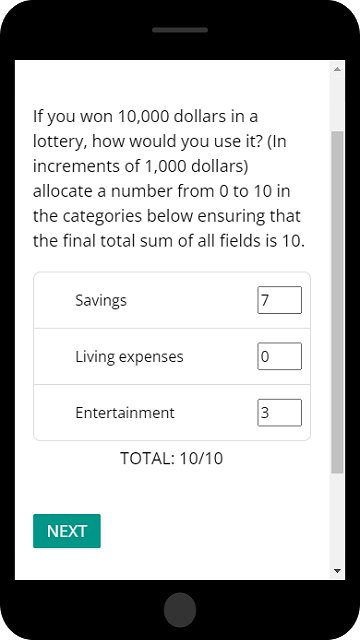
- Constant Sum -
This is a style of questioning in which a defined score is asked to be allocated to a number of items. Also known as the constant allocation method.
QUESTION OPTION SETTINGS
Add Page Break
Randomize Choices
Force Responses
Total
Redirect to
Piping
BLOCK OPTION SETTINGS
Record time spent on page
Hide NEXT button until time expires
Next page when time expires (hide next button)
Next page when time expires (show next button)
Disable responses when time expires
If the option checkbox has a blue tick, it is selected. Click again to return to blank (no selection). Once you have changed your selection, be sure to press "Submit".